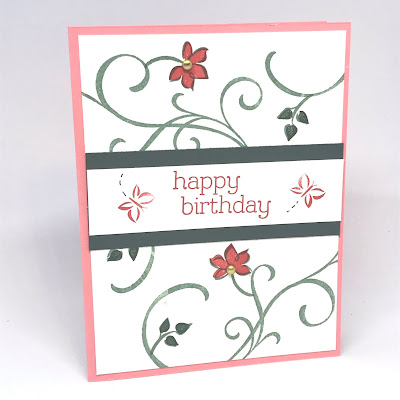
Sentimental Swirls - Happy Birthday card


Welcome back to the Sentimental Swirls series!


This week we have been making four different cards from one sheet of stamped swirls.

We stamped an entire 8½" x 11" Basic White cardstock with the swirl using Soft Succulent.

Then, we cut that sheet into four pieces measuring 4" x 5¼".  We used one of those panels to make the "thank you" card and the "hello" card. 

Today, let's make the "Happy Birthday" card! After all, my birthday is on the 30th--- don't miss it!

This stampset is so simplistically beautiful!!!  The possibilities are endless.  Thanks to Sam Hammond for designing such a great set!

Sentimental Swirls
Buy it now!


Items Needed:

Sentimental Swirls stampset
Basic White cardstock (8½" x 11")
Flirty Flamingo cardstock (cut to 8½" x 5½", scored at 4¼")
Soft Succulent Ink
Evening Evergreen Ink
Poppy Parade Ink
Brushed Metallic Dots

All items have been added to a shopping list for your convenience.
Click here to shop the list- don't worry, you can remove any items you already have.

Instructions:

  • Stamp the large swirl in Soft Succulent ink over the Basic White cardstock. Make sure to not crowd it.
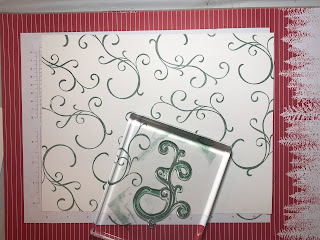
  • Cut the sheet into 4 pieces, each 5¼" x 4".
  • Add a few leaf outlines and flowers stemming from the vine in Soft Succulent.
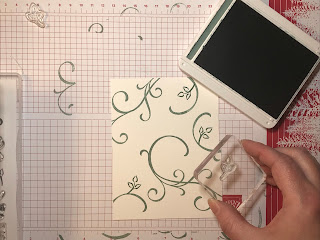

  • Use the solid leaf stamp in Evening Evergreen. Use the solid flower stamp in Poppy Parade.
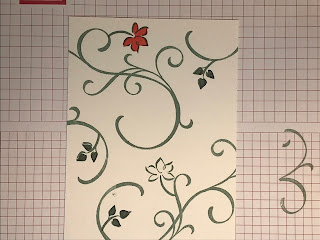

  • Cut Basic White to 1" x 4". Stamp "happy birthday" and the butterflies in Poppy Parade.
  • Adhere the white strip onto a piece of Evening Evergreen cardstock cut to 1½" x 4". Adhere this to the front of your panel.
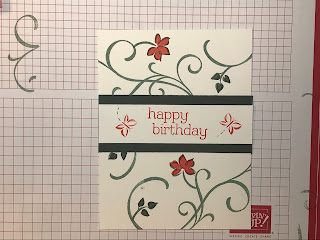

  • Add the Brushed Metallic Dots to be the center of the flowers.
  • Adhere the panel to the front of your Flirty Flamingo cardbase.
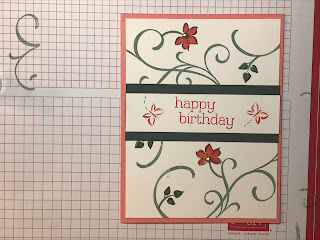
So simple and easy!!!  Join me tomorrow night to make my favorite of the four!  Simple and beautiful!!!   It will be posted at 5 pm tomorrow!

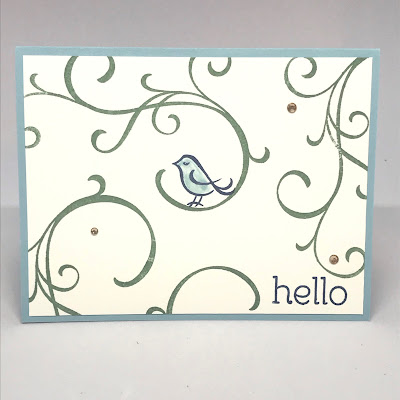
Sentimental Swirls- Hello card


Welcome back to the Sentimental Swirls Series!


Yesterday, we started a series of four cards using one sheet of the large swirl from the new Sentimental Swirls stampset. 

We stamped an entire 8½" x 11" Basic White cardstock with the swirl using Soft Succulent.

Then, we cut that sheet into four pieces measuring 4" x 5¼".  We used one of those panels to make the "thank you" card.

Today, let's make the "Hello" card using the adorable bird stamp.

Sentimental Swirls
Buy it now!


Items Needed:

Sentimental Swirls stampset
Basic White cardstock (8½" x 11")
Balmy Blue cardstock (cut to 8½" x 5½", scored at 4¼")
Soft Succulent Ink
Misty Moonlight Ink
Balmy Blue Ink
Wink of Stella
Champagne Rhinestone Basic Jewels

All items have been added to a shopping list for your convenience.
Click here to shop the list- don't worry, you can remove any items you already have.

Instructions:

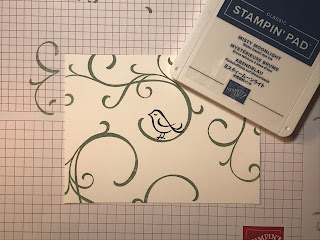
  • Stamp the large swirl in Soft Succulent ink over the Basic White cardstock. Make sure to not crowd it.
  • Cut the sheet into 4 pieces, each 5¼" x 4".
  • Stamp the bird in Misty Moonlight. Don't worry if it is not in the center of the card.  He just needs to perch on a swirl.

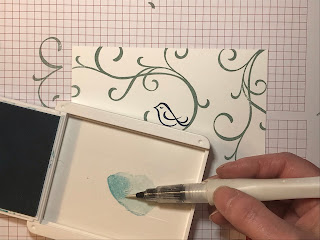
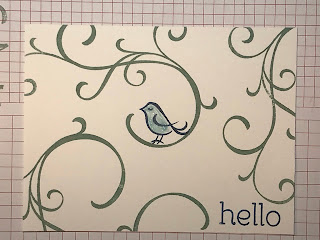
  • Using your Wink of Stella as a paintbrush, dip it in a bit of Balmy Blue ink and paint the bird.


  • Stamp the "hello" in Misty Moonlight where ever you can fit it between the swirls.


  • Add your rhinestones.
  • Adhere the panel to the front of your Balmy Blue cardbase.
There you have it!!!  And still enough panels to make two more cards!!!  A little birdie told me that the "happy birthday" card will appear tomorrow at 5 pm.  Come back and check it out!

Sentimental Swirls- Customer Appreciation Card


Welcome to Sentimental Swirls!  

Throughout this week I will be showing a total of 4 cards made with just one 8½" x 11" sheet of the large swirl image.  Make sure to come back to see them all!

This blog is part of a demonstrator training blog hop.  When you are done taking a look at my blog, hop on to the next blog from the list below.  That blog will have the same list at the bottom, and you will just hop on along to the next blog on the list.  That is so much better than googling the night away!!  All this talent in one quick and easy list! 


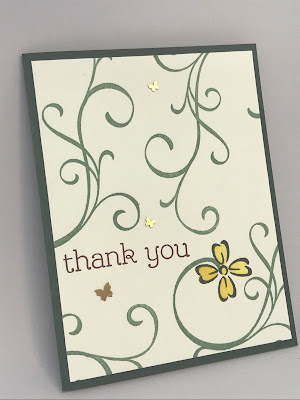
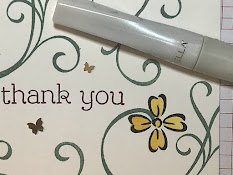
Sentimental Swirls is my favorite stampset from the new Stampin' Up!® catalog because it quickly creates beautiful cards that can be used for any occasion.  This is my customer appreciation card for January 2022.  Use my current host code when placing your order and you will get this card, from me, as a token of my appreciation.

Sentimental Swirls
Buy it now!


Items Needed:

Sentimental Swirls stampset
Basic White cardstock (8½" x 11")
Evening Evergreen  cardstock (cut to 8½" x 5½", scored at 4¼")
Soft Succulent Ink
Merry Merlot Ink
Crushed Curry Ink
Memento Black Ink
Wink of Stella
Brushed Brass Butterflies

All items have been added to a shopping list for your convenience.
Click here to shop the list- don't worry, you can remove any items you already have.

Instructions:
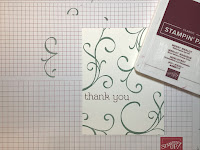
  • Stamp the large swirl in Soft Succulent ink over the Basic White cardstock. Make sure to not crowd it.


  • Cut the sheet into 4 pieces, each 5¼" x 4".
  • Pick a piece that has enough "open space" on it to fit the "thank you" sentiment between the swirls.
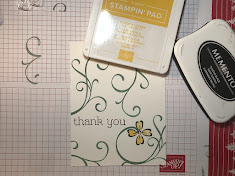
  • Stamp the "thank you" in Merry Merlot. 

  • Stamp the flower outline in Memento Black at the end of one of the swirls.
  • Use the solid flower stamp to add Crushed Curry to your flower.
 
  • Apply Wink of Stella to the flower.

  • Add your butterflies.
  • Adhere panel to the front of your Evening Evergreen cardbase.
See how easy that was???  And you have three more panels to make more cards. Don't forget to check back to see the others. But in the meantime, hop on to the next blog and check out some cool cards!


Welcome to Honeybee Home


Learn how to make this card or get it for free below!

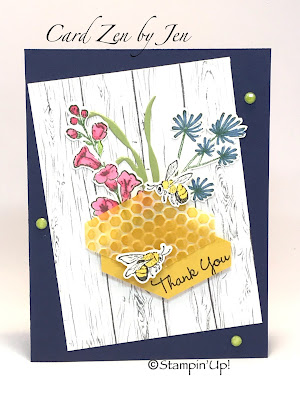
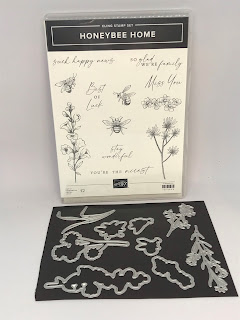
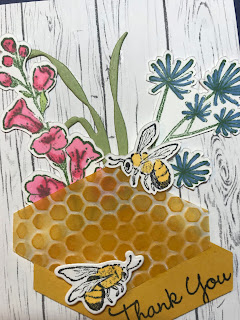
I'm featuring the Honeybee Home bundle, the Heart and Home DSP, and the Hive 3D embossing folder that will be arriving in the Jan-Jun 2022 catalog on 1/4/2022!!!
My team members are receiving this card in January as a small token of my appreciation.  Check out how to get it for yourself during the special Sale-a-bration join promotion (see below).

As if that wasn't enough, this card is also my entry in Kylie Bertucci's International Blog Hop Highlights. The top 10 winners get to participate in a special blog hop.  Will you be so kind as to vote for me?
Now onto the card and this awesome Honeybee Home Bundle!!
Honeybee Home bundle


Directions:

  • Cut Night of Navy cardstock to 8½" x 5½", scoring at 4¼" for the card base.
  • Cut DSP (Heart and Home) to 3½" x 4¾". Adhere to cardfront as shown.
 
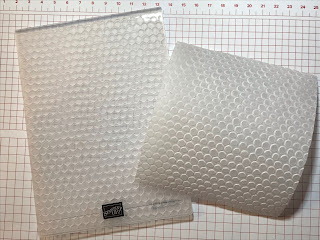
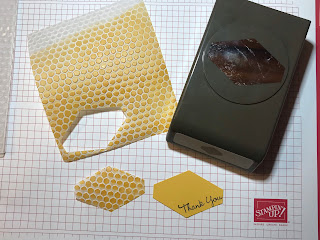
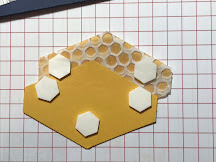
  • Place vellum in Hive 3D embossing folder and run through embossing machine.  Apply Crushed Curry ink to the vellum by pressing the ink pad directly onto the vellum until you get the desired color.  


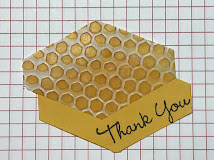
  • Using the Taylored Tag punch, punch the "beewax" vellum and a piece of Crushed Curry cardstock.  Stamp the Crushed Curry piece with the "thank you" in the Pansy Patch stampset.


  • Adhere the beeswax to the Crushed Curry piece as shown.  Add dimensionals but not at the top (so you can tuck the flowers in).  Adhere to the lower half of the card.
  • Stamp the flowers in Garden Green ink, die cut, then color with Stampin' Blends. Cut the blades of grass using from Pear Pizzazz cardstock.  Add glue to the back and tuck them into the top of the beeswax as shown.
  • Stamp the flying honeybees in Memento Tuxedo Black and cut out using the coordinating dies. Color with Stampin' Blends and add Wink of Stella to the wings.  Add to the card using dimesionals.


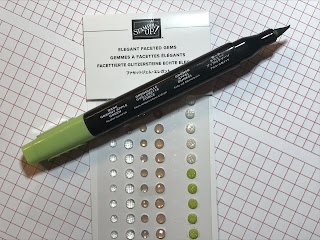
  • We are not done yet....  let me show you one more trick!!   Add color to your white elegant faceted gems using Stampin' Blends.  Oh yeah.... this is awesome!! (I used the dark Granny Apple Green.)  Then apply to your card.


So there you have it!  You can make your own or join my team and let me do all the work for you!!
Oh, and if you join between 1/4/2022 and 2/28/2022, you get two free stamp sets!!!

JOIN NOW!!  (on 1/4/2022 or after for the best deal!!)

Whether you stamp as a hobby or you want to explore your selling potential, January 4th to February 28th is the time to do it!! 
  • You CHOOSE any $125 worth of products, and pay only $99.
  • No shipping costs on this starter order.
  • Pick two free stampsets - pick any sets from any catalog as long as they are currently available. (Yes, you can pick the Honeybee Home!!)
  • Receive a minimum of 20% off your future orders while you remain part of the Stampin' Up! team.
  • Get exclusive sneak peaks to upcoming catalogs and sale-a-bration products and be able to preorder before everyone else!
  • You get access to a community of talented individuals who are all willing to share their talent and wisdom. We really are a family at Stampin' Up!® !
*Please contact me with any questions at cardzenbyjen@yahoo.com or at  814-883-3776. 

Quick Tip - Creating Animal Prints


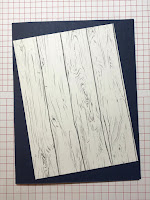
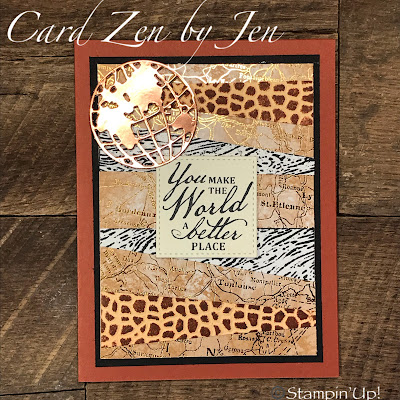
The strips of zebra and giraffe prints made this African themed card come together!  It was a special request for a neighbor...the challenge was that she wanted the zebra and giraffe prints and Stampin'   Up!® didn't have any DSP (designer series paper) at the time with giraffes and zebras. 

I had to get a little creative. And THAT is what I love to do. 

I started to feel like MacGyver or the NASA team when they have to make something out of whatever is in the room. And then it came to me.  Embossing folders!!  No, I didn't ink my embossing folders! (I've done it before though and it is quite messy.) 

Follow along on this quick video and see how truly easy it was to create these animal prints!  You will be hooked!


**** Please note that the Timber 3D folder is re-appearing in the upcoming Jan-Jun 2022 catalog.  I said that it would reappear in the annual catalog in the video.  I was wrong.... it happens sometimes!!

So grab your Hammered Metal and Timber folders and let's make something fun!!!  Be sure to send me a pic! Otherwise, I just feel left out. 

On To the B Sides!!!


This blog is part of a demonstrator training blog hop.  When you are done taking a look at my blog, hop on to the next blog from the list below.  That blog will have the same list at the bottom, and you will just hop on along to the next blog on the list.  That is so much better than googling the night away!!  All this talent in one quick and easy list! 


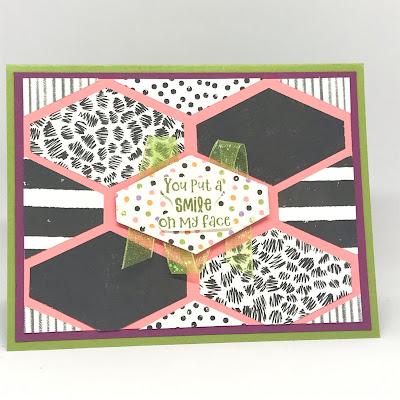
Welcome to Card Zen by Jen!  This is my December/January Customer Appreciation card.  What does that mean??  Place an order using my current host code, 3W9J72PD, and you will get this card mailed to you for your personal use. Tried something a bit different for this card.... I used the B sides.  I have always been a lover of the B sides.  It all started with Queen's "Another One Bites the Dust."  Can you believe it was on the B side?? Never underestimate them. 

So, here we are in December... about to close out the June-Dec catalog and I have loads of the Cute Halloween paper left as well as the Cutest Halloween stampset.  Oh what is a girl to do???  Let's use some B sides.

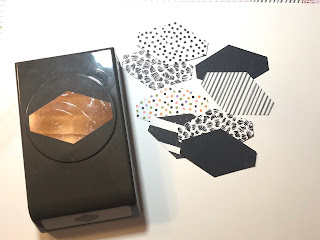
Here are the A sides and B sides of this paper and the stampset. At a glance, it seems like you can only use this for Halloween, but let's think outside the box a little.


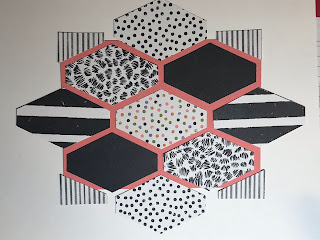
Using the Taylored Tag, I cut the shapes from the B sides.


Cut Flirty Flamingo cardstock to 3¾" x 5".

I started with the paper using the colored dots in the center and added the black and white shapes around it. Your shapes will go off the cardstock.

*** I put the center image down with TEMPORARY ADHESIVE while I worked out my design. I then adhered the black and white shapes with permanent adhesive.  Don't permanently adhere the colored center shape just yet.


Turn it over and cut around the cardstock.


Center it onto Rich Razzleberry cardstock measuring 4" x 5¼".

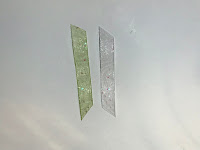
Did you know that we have Granny Green glittered organdy ribbon??  Well, we actually have white, but all you have to do is color it with a Stampin' Blend.  You can do this will all the white ribbons that Stampin' Up! sells. (Talk about the ultimate B side!)
So, you guessed it, color your ribbon!!!

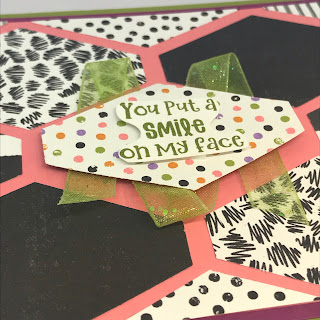
Remove the center shape from your card, add some dimensionsals and wrap your ribbon behind it. 

Stamp the "You put a smile on my face" in Old Olive on Basic White cardstock.  Fussy cut it out. Add it to the center of your center shape using a dimensional. 
Adhere it to Old Olive cardstock (Gray Granite works well also.)


I hope that this really does put a smile on your face.  Take a look around your current supplies and see if they don't have some B sides that are still useful.

Don't forget to place your order using my current host code to get this card for free!


Reflected in Nature


This Reflected in Nature monochromatic card is my contribution to Kylie Bertucci's Monthly International Blog Highlights and my team member appreciation card for December. 

I would be honored if you would take a second to vote for my card.  The top 10 will get to participate in the Winner's Circle and I so want to be there!!!


As we near the end of the July-Dec 2021 catalog, I am drawn to some of the overlooked stampsets that will be retiring such as Reflected in Nature and Well-Defined.  And sadder yet, the designer series paper "Peaceful Place" will also retire. Have you seen it?  Absolutely beautiful, and it can be paired with any colors, or keep it monochromatic, like this.  

Items needed:

Cardstock: Smoky Slate, Basic Black, Basic White
Peaceful Place DSP 
Stampsets: Well-Defined, Reflected in Nature
Ink: Smoky Slate, Tuxedo Black Memento
Glittered Organdy Ribbon

Directions:

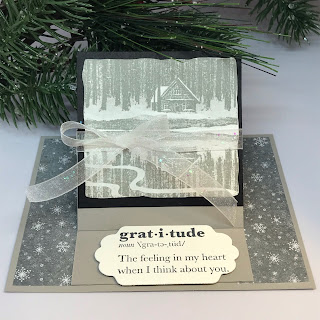
~Cut the Smoky Slate cs to 4¼" x 5½"  for the base. Cut another piece 3¼" x 8' for the easel, scored at 4" and 6".

~Cut two pieces of the DSP to 4" x 1½". Adhere to the base as shown. Then adhere the Smoky Slate cs centered to the base so that it will act as an easel.


~Stamp the reflected cabin scene in Smoky Slate on a piece of Basic White, then fussy cut around the image. Adhere it to the Basic Black cs (cut to 3¼" x 3⅛").  Center it on the folded Smoky Slate piece. ADHERE ONLY BELOW THE FOLD. 
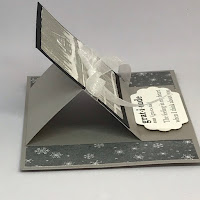
~Wrap the ribbon and tie a bow.

~Stamp your sentiment from "Well-Defined" onto Basic White cs, then die cut it using the smaller label die from the "Seasonal Labels Dies."

~Adhere the label to the inside of the card with dimensionals, just high enough to not be seen when you close the card.

Join my team before the end of December and you will get this card from me!  

Don't forget to get these stamps and paper before they are gone - which is January 3rd or when they are sold out, whichever comes first.  If you order through me using my current Host Code (shown on the right of this screen), you will get my customer appreciation card for December!  

Well Defined
Peaceful Place DSP


Quick Tip Tuesday - Hold my Glue!!!


To buy it now - click here.


 I love using the Tombow liquid glue and it is just $4 through Stampin' Up!®. I go through about 2-3 tubes a month!

When I am putting my cards together, I don't want to be bothered to screw the lid back on. That takes two hands and usually my other hand is holding my paper. If I just lay it on it's side on my craft table, then I have to wait for the glue to run back down to the bottom when I need it again. Forget it!!!

I started looking for a solution.. some friends just put it upside down in a shot glass and let the glue run out of it.... I am WAY too cheap for that....frugal, we will call it frugal. So, here is my solution that has been doing the job for the past year!

Here's an inexpensive (and fun) way to create a glue holder. You can even personalize it- have fun!


Join me next week, when I teach you how to debone a chicken.

Just kidding, who has time for cooking while we are having so much fun stamping???